First-Time SSH Setup: Unlocking Your Red Hat Linux Server
Ah, the sweet smell of a freshly minted Red Hat Linux server! It’s a blank canvas waiting to be adorned with your system administration artistry. But before you can unleash your full potential, you’ll need to establish a secure connection – and that’s where SSH comes into play.
For the uninitiated, SSH (Secure Shell) is your gateway to remote server management, allowing you to control and configure your system from the comfort of your local machine. It’s like having a virtual teleportation device that whisks you straight into the heart of your server’s inner workings.
But enough with the poetic ramblings; let’s dive into the nitty-gritty of setting up SSH access for the first time on your Red Hat Linux server.
Step 1: Ensure SSH is Installed and Running
Before we can even think about connecting, we need to make sure that the SSH service is up and running on your server. Luckily, Red Hat Linux comes with SSH pre-installed, but it’s always a good idea to double-check.
Open up your trusty terminal and enter the following command:
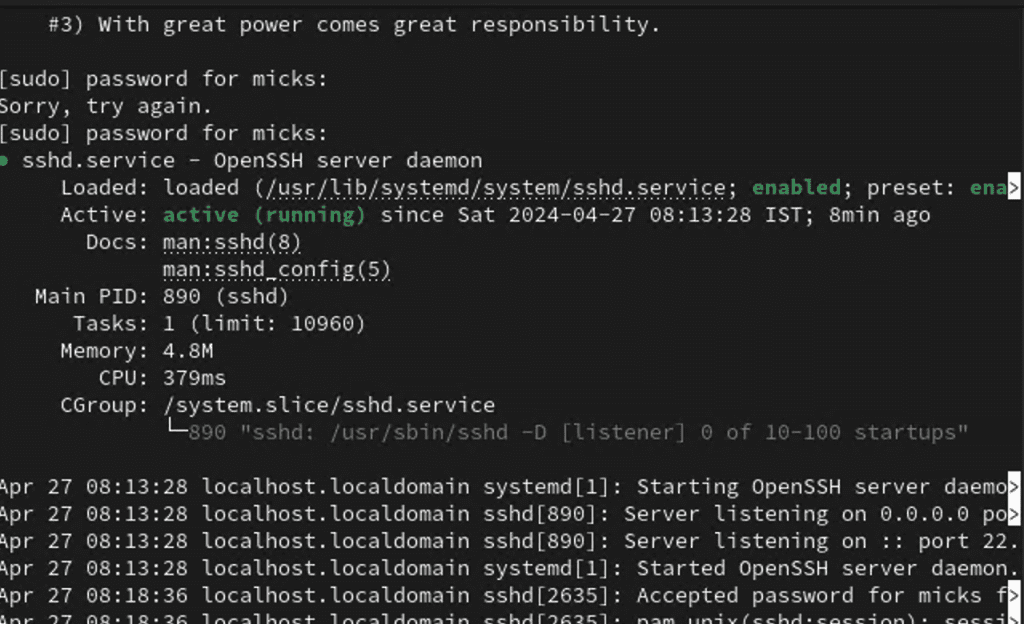
sudo systemctl status sshdIf the SSH service is running, you should see something along the lines of “Active: active (running).” If not, don’t panic! You can start the service with:
sudo systemctl start sshd
Step 2: Configure Firewall Rules
Security is paramount when dealing with remote access, and that’s where firewalls come into play. On Red Hat Linux, the firewall is managed by the firewalld service, which acts as a virtual bouncer, deciding who gets in and who gets bounced.
To allow SSH connections through the firewall, run the following command:
sudo firewall-cmd --permanent --add-service=ssh
sudo firewall-cmd --reload
This command adds a permanent rule to the firewall, allowing SSH connections to pass through unhindered.
Step 3: Obtain Your Server’s IP Address or Hostname
Now that your server is ready to receive SSH connections, you’ll need to know its IP address or hostname. This is like having the coordinates for your virtual teleportation device.
If you’re working on a local network, you can usually find your server’s IP address by running:
ip addr showLook for the “inet” entry under the relevant network interface (e.g., eth0 or ens33).
If your server is hosted remotely, you’ll need to obtain the public IP address or hostname from your hosting provider.
Step 4: Connect via SSH
With your server’s IP address or hostname in hand, it’s time to initiate the SSH connection from your local machine. Open up your terminal (or your favorite SSH client) and enter the following command:
ssh username@ip_address_or_hostnameReplace username with the appropriate user account on your server, and ip_address_or_hostname with the actual IP address or hostname you obtained in the previous step.
If this is your first time connecting, you’ll be prompted to accept the server’s host key fingerprint. This is a security measure to ensure you’re connecting to the intended server. Go ahead and accept the fingerprint by typing “yes” and hitting Enter.
Step 5: Authenticate and Bask in the Glory
Depending on your server’s configuration, you may be prompted for a password or asked to provide an SSH key for authentication. If you’re using a password, enter it when prompted, and voilà! You should be greeted with a glorious command prompt, signaling that you’ve successfully established an SSH connection to your Red Hat Linux server.
From here, the world is your oyster. You can navigate directories, edit files, run commands, and generally flex your system administration muscles to your heart’s content.
Congratulations, you’ve taken your first steps into the realm of remote server management! With SSH at your fingertips, you now have the power to control and configure your Red Hat Linux server from anywhere in the world, all while maintaining a secure and encrypted connection.
But this is just the beginning, my friend. As you delve deeper into the world of system administration, you’ll discover even more powerful SSH techniques, such as key-based authentication, port forwarding, and tunneling. But for now, bask in the glory of your newfound SSH mastery, and know that greater challenges (and rewards) await those daring enough to venture further down the rabbit hole.
Happy SSHing!