
Step-by-Step: Installing MySQL Workbench on Mac
Whether you’re a seasoned developer or just starting out, having a powerful database system is crucial for building dynamic web applications. MySQL has long been a popular open-source database option, loved by developers across many stacks. In this comprehensive tutorial, we’ll cover how to download, install, and configure the latest version of MySQL Workbench on Mac OS Sonoma. MySQL Workbench is the premier GUI database modeling tool for MySQL, allowing you to visually design and manage databases.
Whether you’re just getting started with MySQL or looking to modernize an old workflow, follow along to get MySQL Workbench running smoothly on your Mac.
Benefits of MySQL Workbench
Before we dive into the installation steps, let’s briefly discuss why MySQL Workbench is worth adding to your web stack.
For developers, the standout features include:
- Visual database design and modeling – Streamline the process of structuring relational datasets.
- Powerful SQL query building and optimization – Write, validate, and run complex queries visually.
- Built-in database migration tools – Easily synchronize schema changes into production environments.
- Database administration capabilities – User, permission, and data management tools.
- Cross-platform availability – Works equally well on Linux, Mac, and Windows systems.
And best of all, MySQL Workbench is 100% free and open-source. The community version offers tons of value for developers without restrictive licensing.
Downloading MySQL Workbench
Now we’re ready to grab the latest MySQL Workbench installer for Mac.
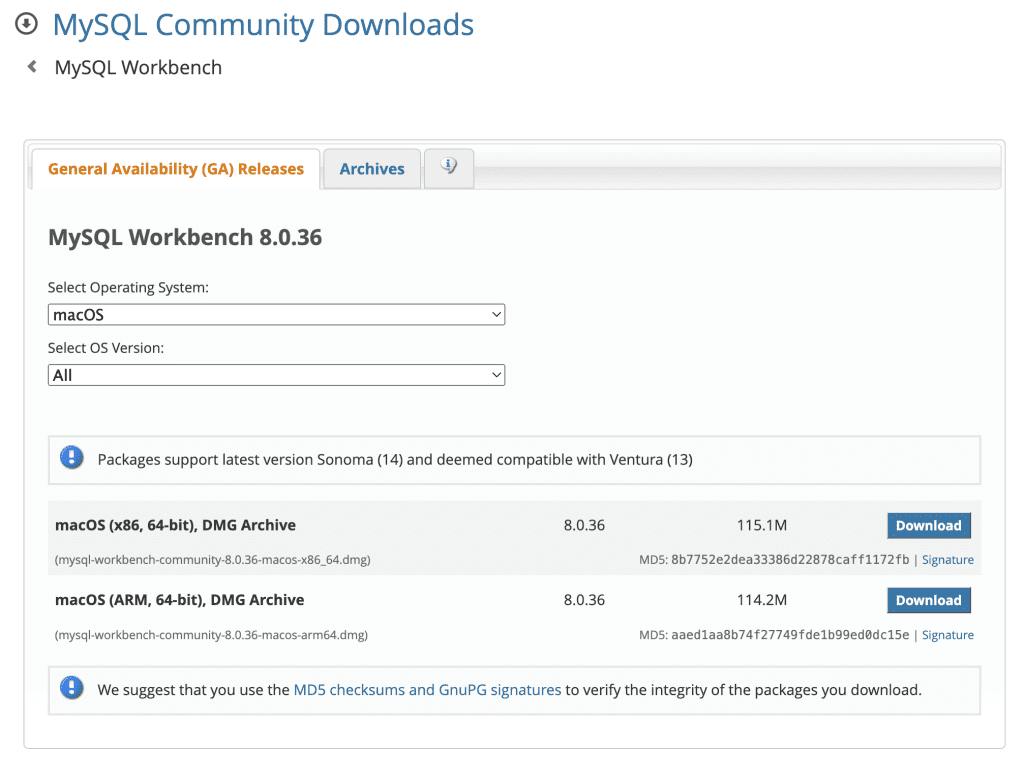
- Open your web browser and navigate to the MySQL Workbench Download Page.
- Under the “Select Operating System” section, click macOS.
- Under the “Select OS Version” section, select macOS (ARM, 64-bit) if you are using the M1 Chip from Apple, if you are using Intel then you must select the macOS (x86, 64-bit)
- Scan the page to ensure you have identified the appropriate Mac installer package. As of this writing, the latest version is 8.0.36.
- Click the Download button to grab the DMG installer file (around 114.2 MB).
The file will begin downloading in your browser. Take note of the downloads location on your local file system.
Installing MySQL Workbench
With the MySQL Workbench PKG package downloaded, we can now install the application locally:
- Using Finder, navigate to the downloads location and double click the MySQL Workbench file (name similar to
mysql-workbench-community-8.0.36-macos-arm64.dmg) - When prompted, enter your administrator password to provide installer access.
- Progress through the standard Installer wizard, accepting the licenses and choosing all default options. Check the MySQL detailed installation for guidance.
- After several minutes, MySQL Workbench will finish the installation process and add itself to your Applications. Success!
If you run into any access or permissions issues during the automated installer process, try temporarily disabling Gatekeeper and antivirus protection. Some security tools can interfere with new software installation on Mac.
Setting up a Connection
With MySQL Workbench installed, let’s set up a local database connection:
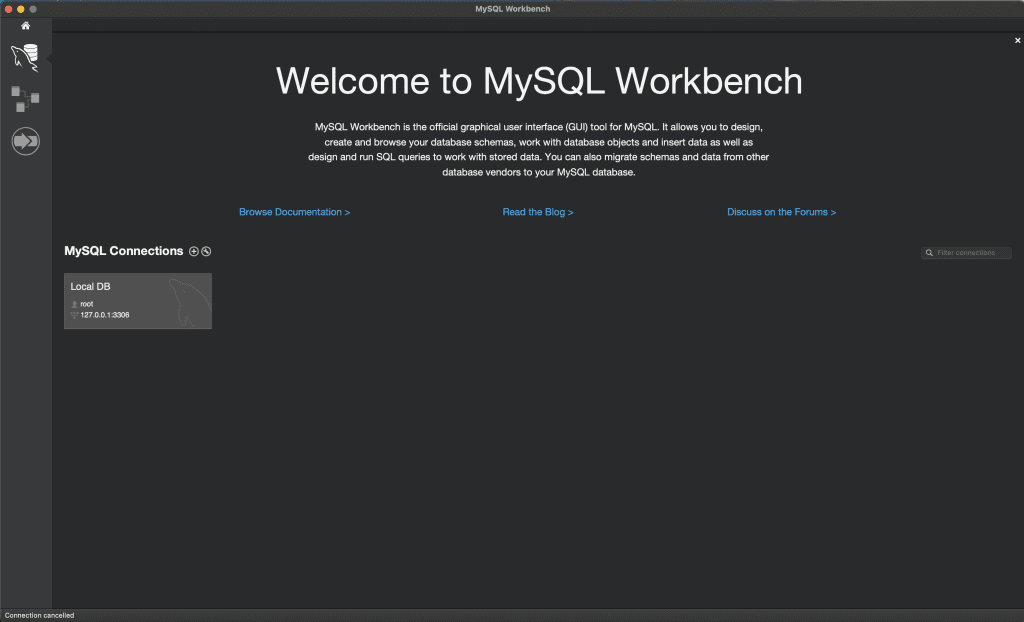
- Launch MySQL Workbench from your Applications folder or Spotlight Search.
- From the home page, select the “+” icon to add a new Database Connection.
- Choose the Standard TCP/IP over SSH connection type.
- For convenience, configure the connection for localhost access:
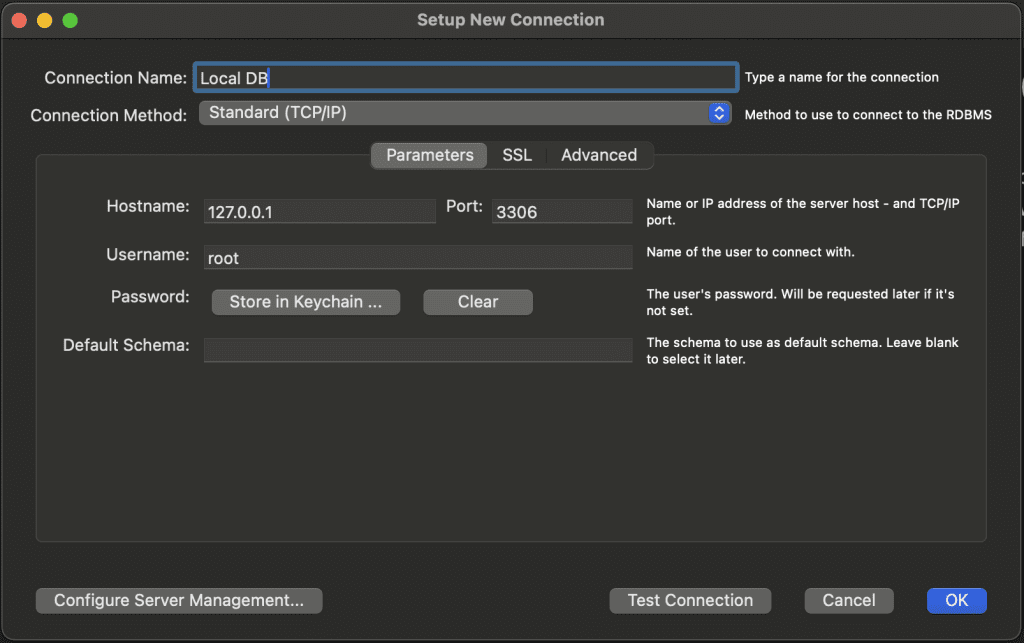
- Connection Name: Local Instance
- Hostname: 127.0.0.1
- Port: 3306
- Username: root
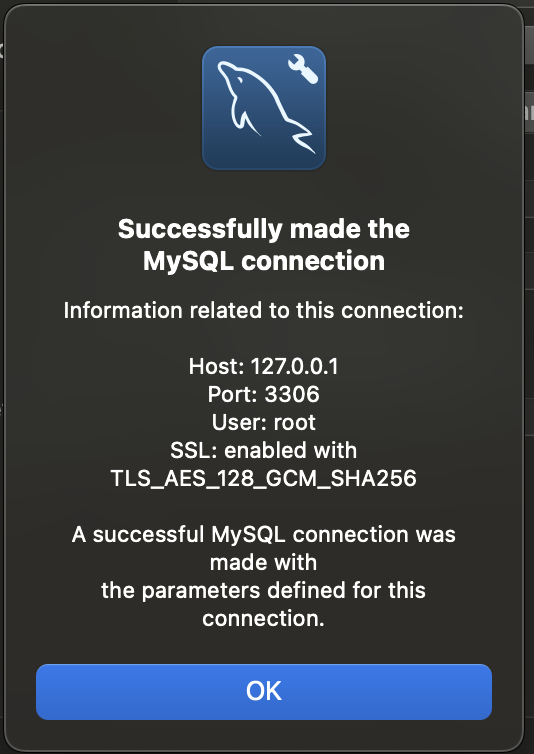
- Click Test Connection to validate everything works correctly.
- Finally, click OK to save the connection.
Success – you now have Workbench connected to the default MySQL server instance running locally!
With a functioning SQL connection, we can explore Workbench or start developing databases and queries.
Creating a Sample Database
Let’s create a simple, sample database to confirm SQL functionality:
- From Workbench Central tab, select the “Local Instance” connection, ensuring the Schema tab displays.
2. Right click the blank schema area and select Create Schema.
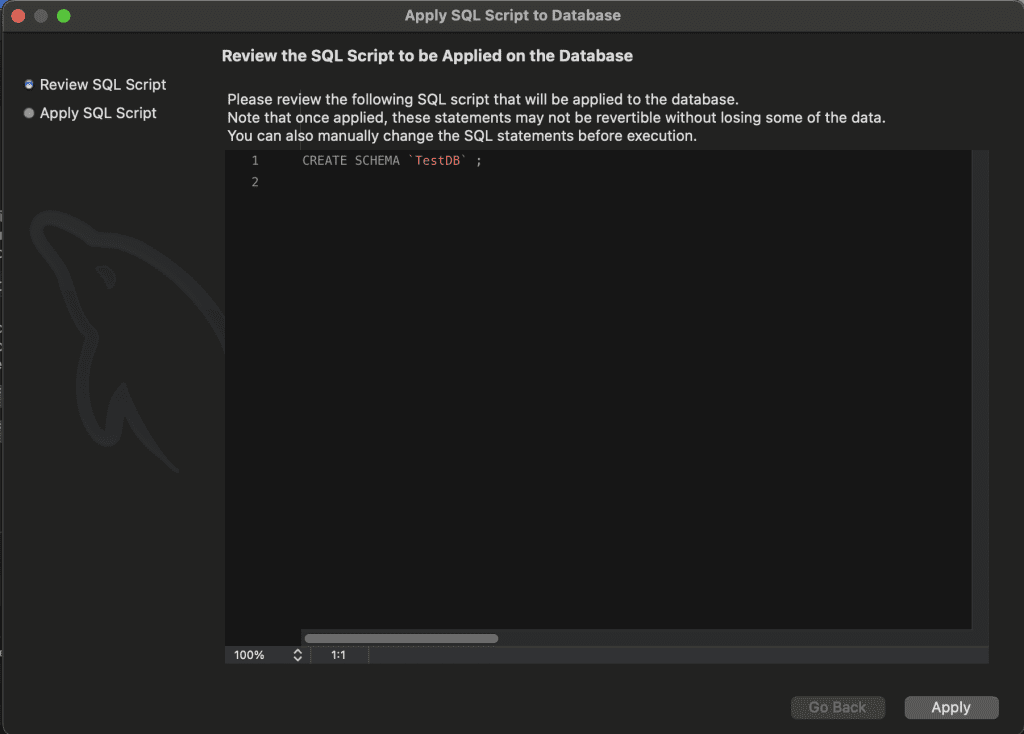
3. Give the schema a descriptive name like “TestDB” and then click Apply
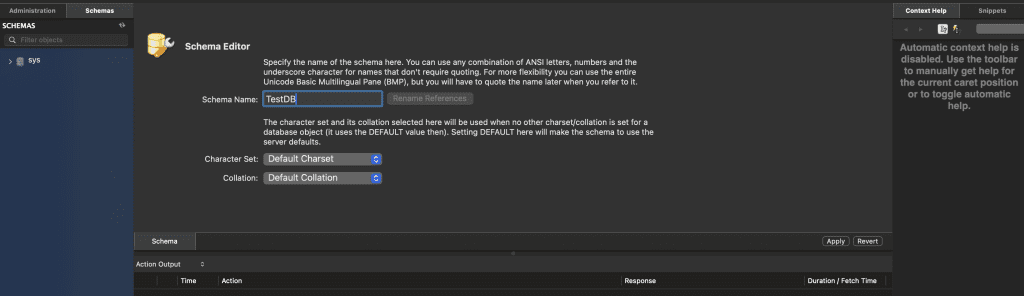
and then Apply again.
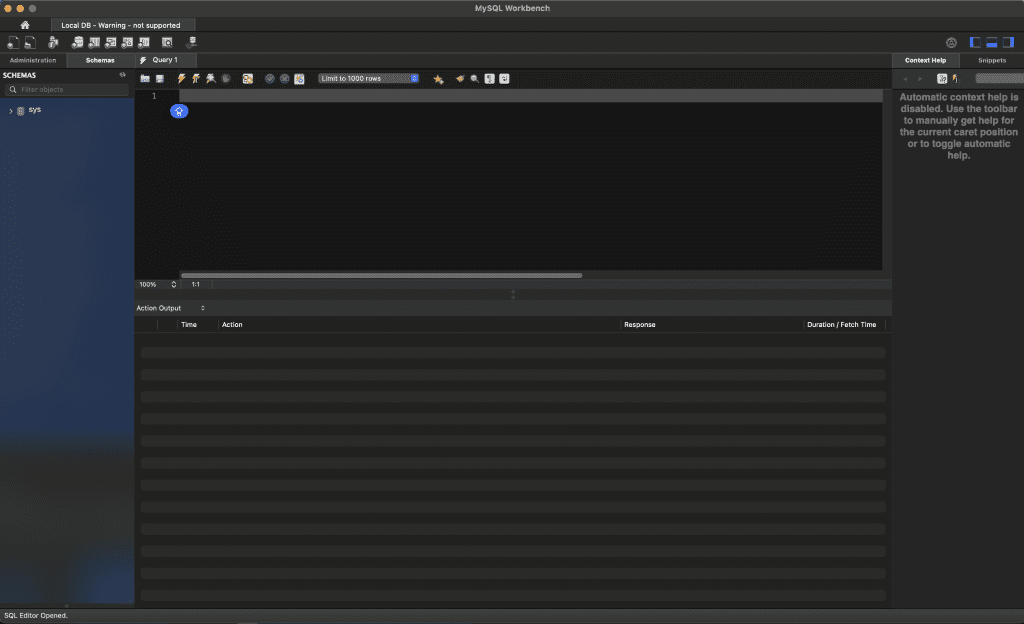
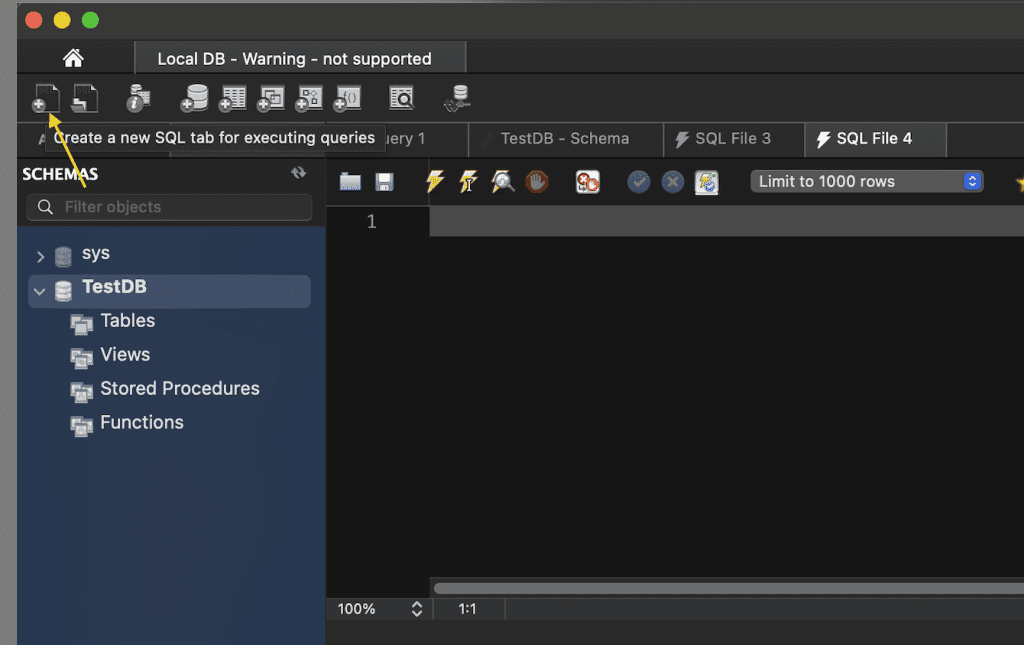
4. With the schema highlighted, open the SQL Editor tab.
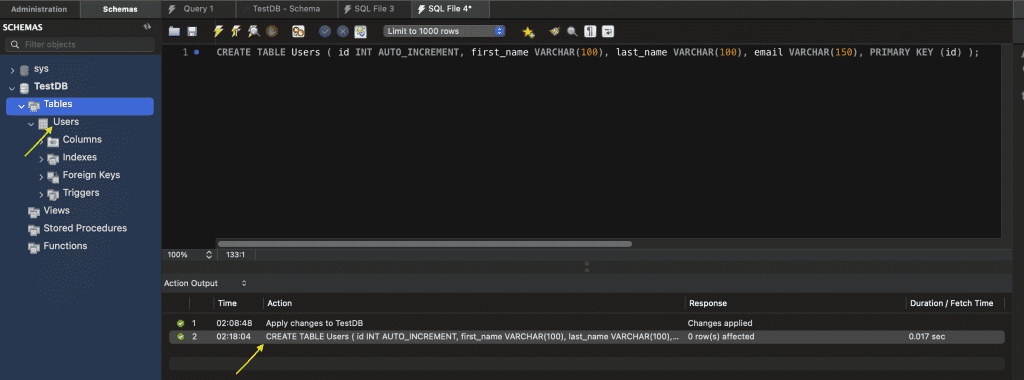
5. Write and execute the following SQL query in the editor to create a simple “Users” table:
sql CREATE TABLE Users ( id INT AUTO_INCREMENT, first_name VARCHAR(100), last_name VARCHAR(100), email VARCHAR(150), PRIMARY KEY (id) );6. Click the lightning icon to execute the statement and build the Users table.

Awesome! You’ve now created your first MySQL database and table completely visually using
Workbench. This is just a small taste of Workbench’s excellent visual development capabilities.
Exploring the Workbench Interface
Since we’ll likely spend significant time working within Workbench, let’s quickly summarize the key interface elements:
Central Home Tabs: Switch between modeled Connections, Object Browsers, and Editors.
Sidebar: Navigate modeled database schemas, execute SQL queries, view visual diagram outputs.
Main Editor: Create and manage database models, write SQL statements, view detailed record outputs.
Top Toolbar: Connect to databases, undo/redo changes, search docs, export models.
Despite offering tons of advanced functionality, the Workbench UI remains clean and intuitive. With just an hour or two of hands-on exploration, you’ll know your way around.
Useful Workbench Tools
Beyond core database development, Workbench ships with additional tools to simplify MySQL administration:
- Table Data Search – Quickly search multiple tables for text matches across columns.
- Data Import/Export – Migrate CSV or JSON datasets in/out of MySQL.
- Database Migration Wizard – Streamline moving legacy database into MySQL.
- User & Privilege Management – Control user accounts and permissions at database or object levels.
- Visual Explain – Visually analyze SQL query execution plans to optimize performance.
Dig into documentation for each feature to tailor MySQL Workbench to your exact development and deployment workflows.
Troubleshooting Common Errors
Let’s briefly highlight solutions for a few common errors:
- Connection Refused – Double check your hostname, port, and account credentials match the target MySQL instance.
- Old Server Version – Some modern Workbench features require the latest MySQL server version (5.6+ recommended).
- SSH Errors – Remote connections may run into SSH key or configuration issues – ensure SSH access works outside Workbench first.
For help with other problems, search the MySQL community forums or check detailed troubleshooting docs.
Next Steps with MySQL Workbench
Nice work – with MySQL Workbench downloaded and connected, you’re ready to start developing!
Some next step suggestions:
- Model your first relational database schema.
- Write complex SQL queries across multiple tables.
- Import and optimize legacy datasets.
- Manage users and permissions.
- Migrate an existing database.
The combination of simplified database modeling, integrated development tools, and powerful query building makes MySQL Workbench an incredible free resource for any developer working with MySQL databases.
As you dig deeper, let us know if you have any other Workbench questions!